Coming up with routers providing strong internet at various places is taken as granted. Setting up the whole thing is not that complicated. While looking forward to the 192.168.1.1, by default is applicable for various routers and modems respectively. And these are considered as host addresses respectively.
Therefore, to access one has to type this respective IP address at the browser's search bar. and next will be the time to provide certain credentials like username and password in order to log in successfully. Usually, both the username and password are going to be available at the respective router panel.

![How to Use Chromecast Without Wifi [Different Latest Methods]](https://trickism.org/wp-content/uploads/2019/02/How-to-Use-Chromecast-Without-Wifi-300x148.jpg)

Here we go into all the details provided in a clear and better understandable format. Look forward into each and every step involved to set up the respective router very well. As a result, doing so one can greatly get strong and powerful internet connectivity for accessing many things online without facing any kind of trouble.
192.168.1.1 Login, Change Password and Wireless Settings
As discussed!!!! By default, the user can locate both username and password on the router itself. If you like to secure all the respective router, try to change the password without making second thought. Also, provide the most unique SSID name so that no one can identify and try to access all your network at any cost.
All this delivers a lot of security and saves from other users accessing the respective network. While getting back to the Belkin routers, the password is set as MiniAP which is distinct and unique comparatively. Most of the times, all the routers come up with default username and password s shown below.
[su_note note_color="#9bfbf5" text_color="#151b17" radius="2"]
Username: admin.
Password: admin.
(or)
Username: admin.
Password: password.
[/su_note]
The credentials provided on the top of the router's admin panel are very simple. One can easily identify and starts using all your availability of the internet. So, therefore, it is very important to hard reset all your password. Doing so no user can locate and dare to use the respective internet connectivity.
Default Router's IP Address and Other Details
All the routers like D-Link, Belkin, Netgear and much more will have the following login credentials on their respective router. Here we go and learn all such things provided on the respective router to access strong internet very well.
[su_table]
| Name of the Router | IP Address | Username | Password |
| TP-Link | 192.168.1.1 192.168.1.254 |
admin | admin/password |
| Linksys | 192.168.1.1 192.168.1.10 192.168.1.254 |
admin | admin |
| Netgear | 192.168.1.1 | admin | admin/password |
| Belkin | 192.168.1.1 192.168.2.1 10.0.0.2 |
none | MiniAP |
| Asus | 192.168.1.1 192.168.2.1 10.10.1.1 |
admin | admin |
| Cisco | 192.168.1.1 | admin | admin |
| Billion | 192.168.1.254 | admin | admin |
[/su_table]
The above table represents various IP addresses applicable for different routers respectively. These help to identify all your respective router's IP address without any fail. One can greatly access and change the settings to a greater extent.
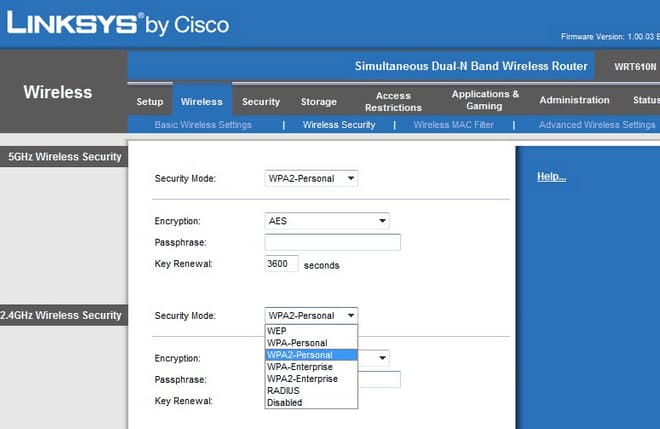
Steps Involved for 192.168.1.1 Change Password
In order to change password, follow and implement all the steps provided below.
- In the first page, navigate to the respective router's admin page on your browser respectively.
- Now go to the Settings-> advanced settings-> select router admin available in the form of lists.
- Click on change password and now it is time to enter all your old and new password in the respective space.
- Finally, click on save.
- That's all!!! As simple as that!!
How to Setup D-Link Router Login
Well, in order to set up the D-Link router without facing any kind of trouble, follow the below steps provided in a clear and better understandable format.
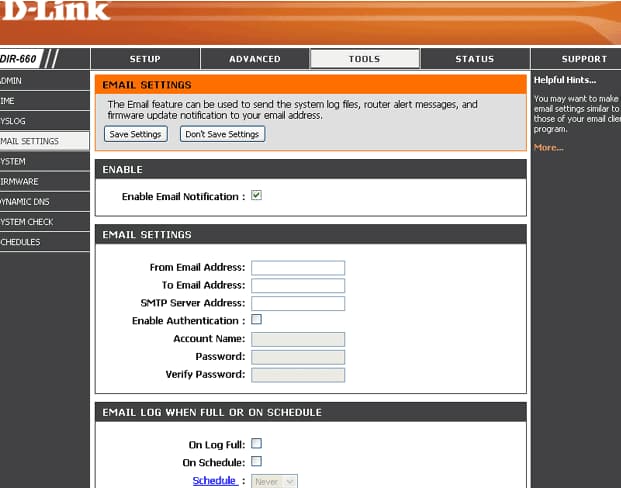
- In the first step, connect the respective D-Link router either to your PC or the system with an original ethernet cable.
- Turn on the system and then open the respective browser which you always prefer.
- There one has to simply type the IP address http://192.168.1.1-> enter.
- Finally, here is the D-Link router administration page where the user is requested to type login credentials such as username and password respectively.
- That's all!!!
Steps Involved for Netgear Router Login Setup
Following is the process involved to setup Netgear without facing any kind of trouble. For better understanding here we go.
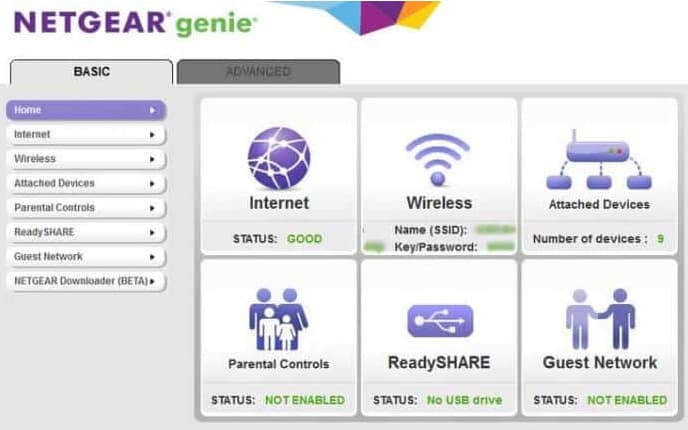
- In the first step, connect the Netgear router with your system successfully.
- Open the respective browser and enter all it's IP address in the available search bar.
- Here is the home page where the user is requested to enter both username and password to login very well.
- Finally, go to wireless settings and then customize accordingly.
- That's all!!!!
Recommended Articles:
- Download android multi tools
- Change my software 8.1 edition download no survey
- Download Cisco packet tracer 7.1.1
- Volume booster windows 10
Setup Cisco Router Login Right Now
Below are the certain instructions involved to set the login without facing any kind of trouble. Therefore, here is the process. Let us go step by step to set right away.
- Firstly, connect the router with your respective system through RJ45 cable.
- Turn on both the router and the system.
- Open the respective browser and type the IP address for navigating to the Cisco Routers admin page.
- Here it is the time to enter all the details like username and password which is available on the panel of the router. If in case, the user has made changes to setting up a new password, enter it accordingly.
- Doing so one can open the official page and there customize settings and use accordingly.
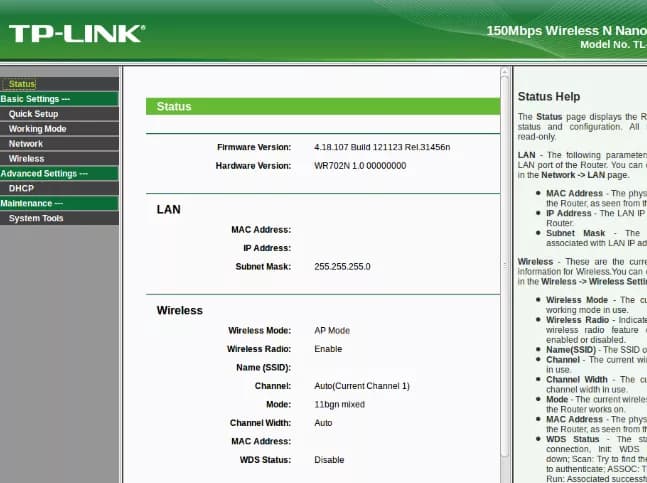
192.168.1.1 TP-Link Router Login Setup Guide
Here is the process involved if you are using a 192.168.1.1 TP-Link router respectively. Follow all the steps and implement accordingly.
- First and foremost, connect the router as well system through RJ45 cable.
- Open the browser and type all it's IP address and then click on enter.
- So that you are requested to enter all the username and password accordingly.
- Finally, here is the official router admin page where one can customize settings and access accordingly.
For more information or any doubts, ca mention in the followed rectangular section. Most of the cases the user face issues like improper installation/ wrong IP address have been provided or any. In that case, the user is requested to read the respective manual and implement the process again following each and every step accordingly.
Wrapping Up
According to my views, the concept is very clear. If you like to learn more information about the login process or any, we help you and guide accordingly. If you think the tutorial is useful, share on any of the social networking sites with no second opinion. Thank you. Keep viewing trickism for more better tricks and useful information irrespective of time and place.


