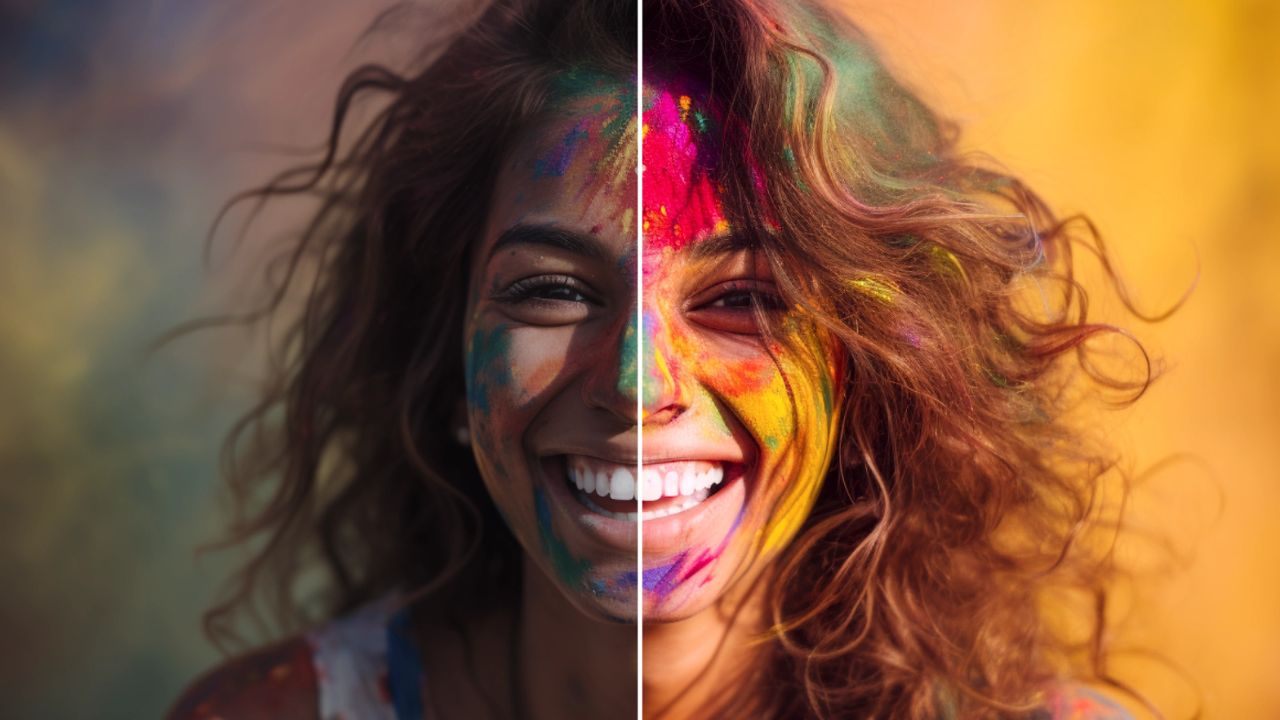
If you are learning modern AI tools, you will quickly notice that photo quality is one of the most practical use cases. If your goal is to improve photos using AI, you should start by understanding what these tools actually change and what they cannot fix.
To improve photos using AI without ruining texture, you need the right enhancer for your specific problem, like noise, blur, or low resolution.


This guide explains how AI enhancement works, which results you can realistically expect, and which tools stand out for different photo problems.
Why AI Photo Enhancers Are Replacing Manual Fixes For Many People
AI photo enhancers are becoming mainstream because they automate tasks that used to require deep editing experience.
They identify noise, blur, and low detail, then apply targeted adjustments that usually hold up in side-by-side comparisons.
The best tools also keep changes reversible, so you can compare versions and avoid going too far. If you edit often or shoot in difficult lighting, AI enhancement can save time without forcing you into complex techniques.
What AI Enhancement Actually Changes In A Photo
Most AI enhancers focus on restoring clarity, managing noise, and improving perceived detail without rewriting the entire image. In practice, that means sharpening edges, reducing grain, and smoothing low-light artifacts while trying to preserve texture.
Tools like Adobe describe AI-powered options such as Denoise, Raw Details, and Super Resolution as part of their Enhance workflow.
The key is that these tools aim to improve image quality while keeping the photo believable, not stylized.
Typical Improvements You Can Expect From AI Tools
AI enhancement is most reliable on common problems like high ISO noise, slight motion blur, and small files that need upscaling.
Topaz Labs promotes capabilities such as Denoise, Sharpen, Recover Faces, and Upscale for photos that look soft or noisy but still have usable structure.
Google Photos highlights tools like Magic Eraser and Photo Unblur for fast improvements on everyday images. If your source file is extremely blurry or heavily compressed, improvement may be limited.
The Tradeoffs You Should Accept Before You Enhance
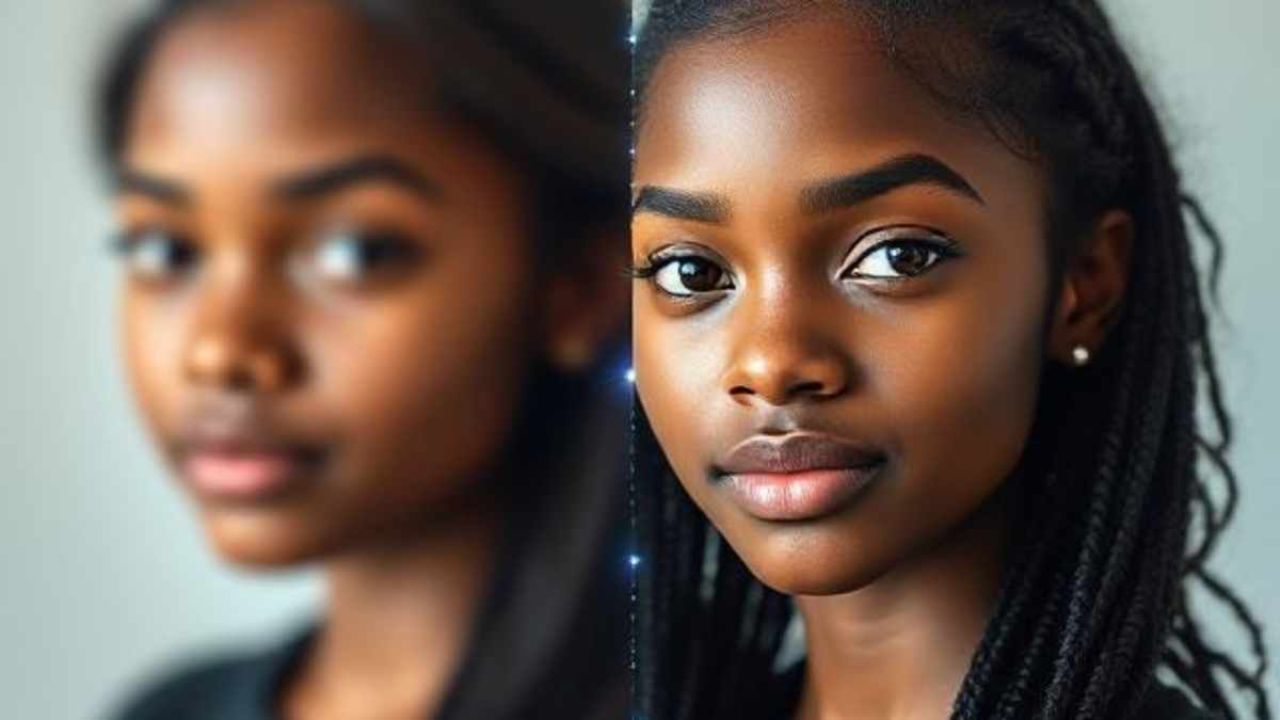
AI can introduce artifacts if you push intensity too hard, especially on skin texture, hair, and fine patterns. Upscaling can also invent detail that looks sharp at first glance but feels artificial when zoomed in.
Another tradeoff is control, because AI makes decisions quickly, so you may need to reduce strength to keep a natural look. The safest habit is to enhance, compare, then dial back until the result looks realistic at full size and on a phone screen.
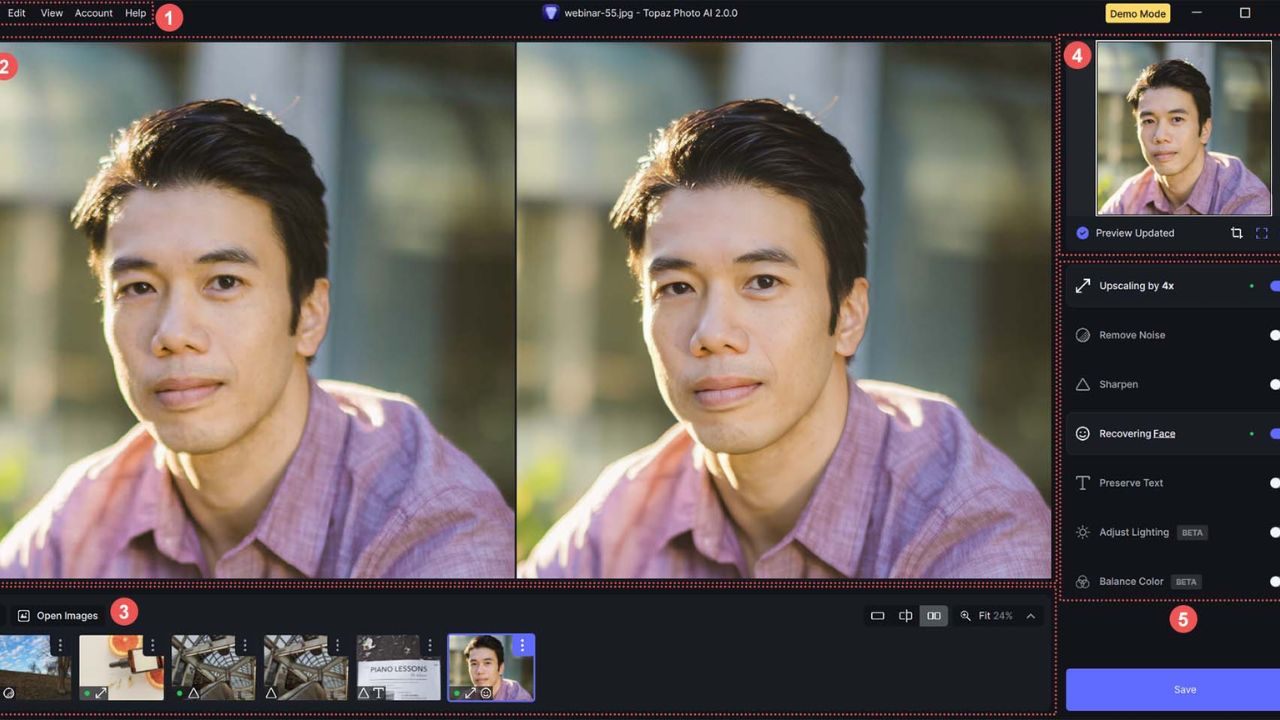
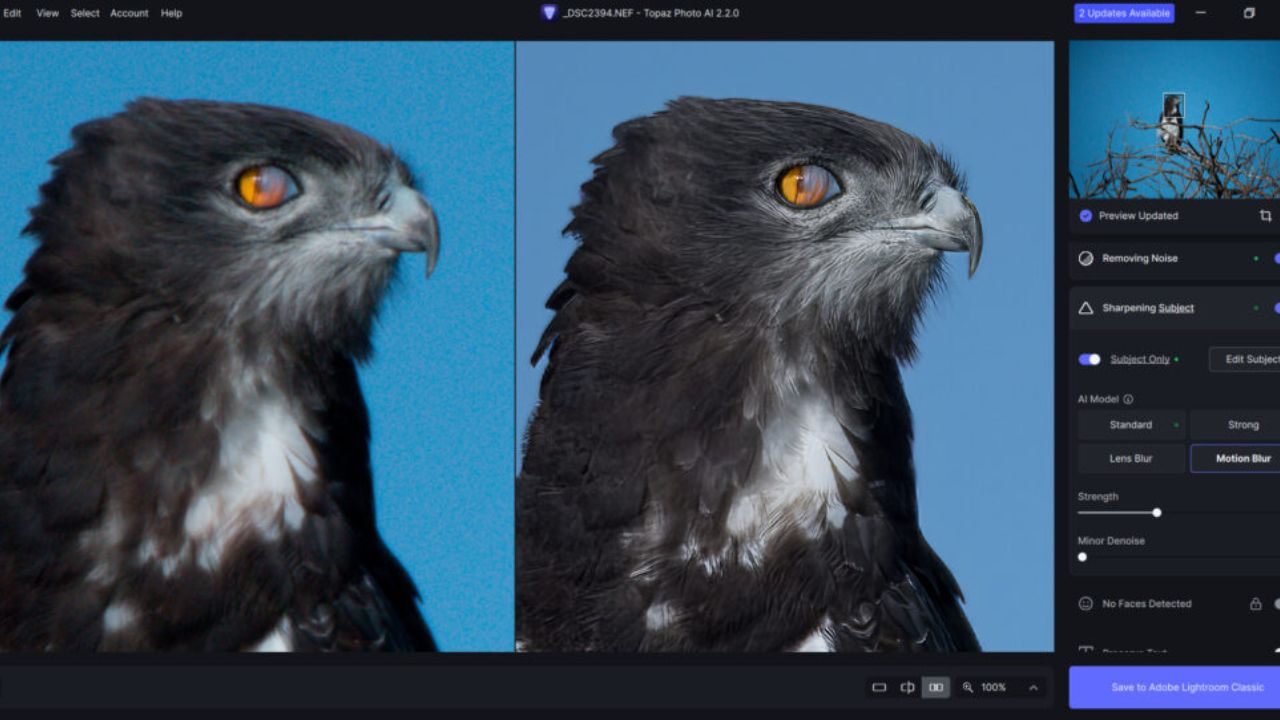
Best For Sharpening And Noise Reduction: Topaz Photo AI
If your biggest issue is softness, noise, or low resolution, a recovery-focused tool is usually the fastest route to improvement.
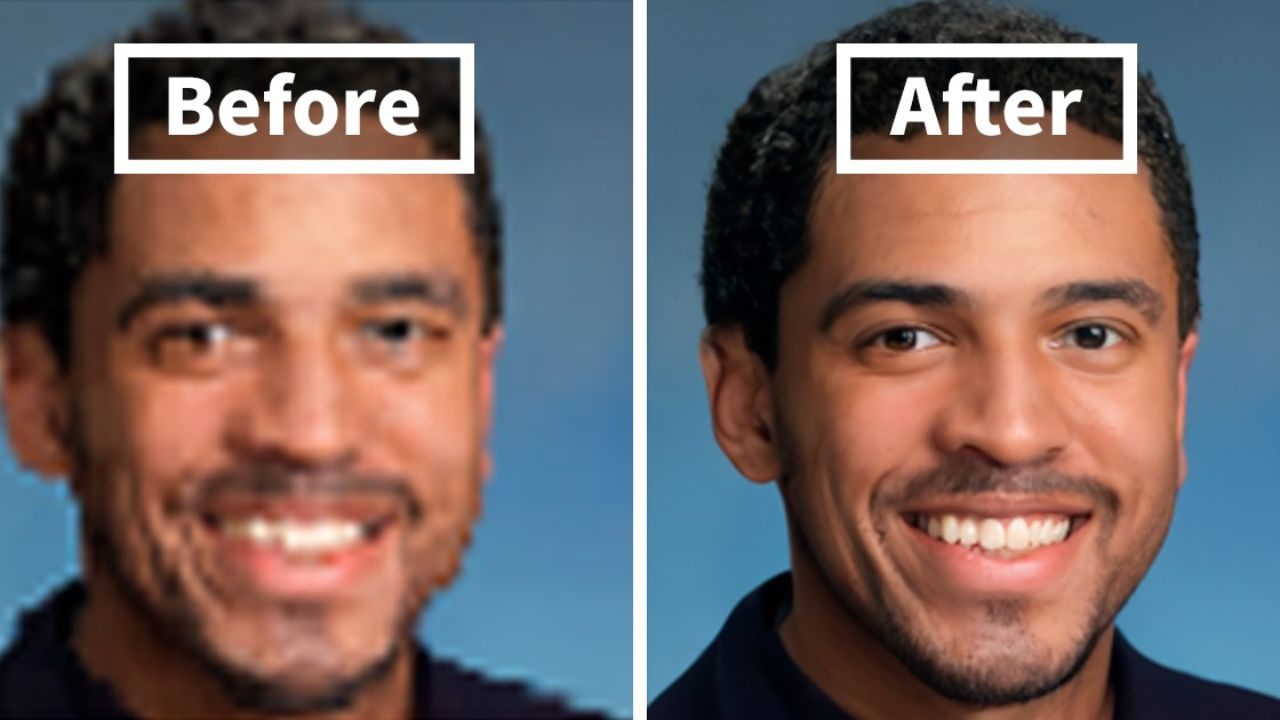
Topaz Photo AI is built around tasks like denoising, sharpening, face recovery, lighting correction, and upscaling.
This makes it a strong option for low-light photos, older images, and action shots where detail matters. You get the most value when your photo is almost usable but held back by quality issues.
Who Should Use Topaz Photo AI
Topaz tends to fit photographers and creators who regularly deal with low light, movement, or heavy cropping.
The tool is positioned for restoring focus and sharpening details, which is useful when a photo is slightly missed but still worth saving.
It also suits people who want consistent technical improvement without building a complex editing workflow. If you frequently export for print, client delivery, or high-resolution posting, the quality lift can be noticeable.
Features That Matter In Real Use
Three features typically decide whether a recovery tool is worth using: denoise that preserves fine detail, sharpening that avoids harsh halos, and upscaling that protects edges and texture.
Topaz highlights Denoise, Sharpen, Recover Faces, and Upscale as core capabilities, plus an autopilot-style option to get started quickly.
Face recovery can be especially helpful in group photos or older images where facial detail is soft. The practical benefit is fewer steps to reach a clean, shareable result.
How To Avoid Overprocessed Looking Results
The fastest way to ruin an enhanced photo is to chase maximum sharpness and remove every trace of grain. Start with moderate settings and check the image at 100 percent zoom, then again at the size you will actually share.
Pay attention to skin and hair, since these areas reveal artificial smoothing quickly. If the photo starts to look plastic or crunchy, reduce the strength and keep some natural texture. Your goal is believable improvement, not a dramatic effect.
Best For Workflow Editing And Clean Detail: Adobe Lightroom Enhance
If you already edit photos or want a complete workflow, Lightroom’s Enhance options are a practical choice because quality fixes can stay inside one environment.
Adobe documents that Enhance includes AI-powered Denoise, Raw Details, and Super Resolution to improve image quality.
This matters because you can clean up noise first, then do exposure and color work without switching tools. For many users, the workflow advantage is as important as the visual improvement.
AI Denoise And Detail Retention In Lightroom
Noise reduction is one of the hardest manual edits to get right because it is easy to smear detail in shadows and skin. Adobe states that Denoise uses AI to reduce noise without losing fine details, which targets that common failure point.
This is especially helpful for indoor events, night scenes, and smartphone images taken in dim light. You still choose the strength, but AI gives you a cleaner starting point than many manual sliders.
Super Resolution And Raw Details For Better Clarity
Lightroom’s Enhance options also include Super Resolution and Raw Details, which are designed to pull more usable detail from supported files.
Super Resolution can help when you need a larger export for printing or cropping, while Raw Details focuses on improving detail extraction from RAW data.
The key is using these tools before heavy color grading, since cleaner detail early often leads to better final results. Keep your edits subtle so the image stays natural.
When Lightroom Beats Manual Editing
Manual sharpening and noise reduction take time, and they require careful masking to avoid ugly artifacts. Lightroom’s AI based approach is designed to reduce those risks and speed up batch editing for many photos from the same scene.
If you routinely edit dozens of images, the time savings can be significant. You still get full control over exposure, tone, and color, but AI handles the repetitive technical cleanup more efficiently.
Best For Mobile And Quick Fixes: Google Photos
If you primarily shoot on your phone, convenience matters because you want improvement without moving files through multiple apps.
Google Photos promotes AI-driven tools like Magic Eraser and Photo Unblur for removing distractions and fixing blur.
These tools target two common reasons people skip sharing a photo: clutter and softness. For casual users, the biggest win is speed, since the edits can be done in seconds and saved as a copy.
Magic Eraser And Photo Unblur For Everyday Photos
Magic Eraser is designed to remove unwanted objects and distractions with minimal effort, which helps when a background ruins an otherwise good shot.
Photo Unblur is designed to improve out-of-focus blur for both new and older photos, which matters when the moment cannot be recreated.
These features are best used lightly, because aggressive removal or sharpening can leave visible patches. Always zoom in to confirm edges look clean before saving.
Newer AI Editing Tools And Suggestions In Google Photos
Google has also been expanding access to its AI editing features, including Magic Editor, Photo Unblur, and Magic Eraser, across more users in Google Photos.
The company also encourages layering AI edits with traditional adjustments to reach the result you want, which is a practical approach when a single tap edit is not enough.
Availability can vary by device, region, and rollout timing, so you should check what appears in your editor. The right workflow is to start with AI, then refine with basic light and color tools.
How To Choose The Right Enhancer And Keep Results Natural
Choose a tool based on your most common problem, not the longest feature list. If you need denoise, sharpening, and upscaling for difficult files, Topaz is built around those recovery tasks.
If you want quality improvements in a full editor, Lightroom Enhance is designed for AI denoising and detail enhancement within a workflow.
If you want fast fixes on your phone, Google Photos focuses on quick tools like Magic Eraser and Photo Unblur. Your rule should be simple: enhance, compare, and reduce strength until the photo looks real.
Conclusion
AI has made photo improvement easier, but it still rewards a careful approach. If you want to improve your photo using AI, the smartest move is to start with one clear goal, fix the biggest flaw first, and keep your edits subtle.
Over-sharpening and heavy smoothing are still the quickest ways to make a photo look unnatural, even with strong tools. When you use AI to support good judgment instead of replacing it, you get cleaner, sharper images that still look like your real life.


